
We recently moved our entire Elmastudio WordPress website from HTTP to HTTPS. To be honest we should have done this change a long time ago. Of course our contact form and shop pages were already HTTPS and we had the SSL certificate. But since I didn’t want to make any mistakes moving our entire website, I was afraid to make the move. In the end the change was much easier and quicker than expected and with a few helpful tips everything went super smoothly.
In case you haven’t made the move to HTTPS yet, you should really start to get prepared. It is really recommended that every website or blog uses HTTPS. If you still ask yourself why, then here are some good reasons:
- All data is secure (e.g. information submitted via a contact forms).
- Builds trust with your website visitors.
- HTTPS is required by law for forms (e.g. contact forms) in some countries like Germany.
- Improves your Google search ranking result rankings.
- Optimizes website speed.
1. The SSL Certificate
The first thing you need to move your website to HTTPS is a SSL certificate. You can purchase this certificate for a few dollars through your hosting provider. If you have multiple sub domains and you also want to change them to HTTPS, you will need a little bit more expensive “Wildcard” SSL certificate for multiple domains. Some hosting providers will also allow you to use a free Let’s Encrypt SSL certificate. You will need to ask your hosting provider for more information on this. The only downside regarding the free Let’s Encrypt certificates is that they are only valid for 90 days and you will need to renew them after that.
The most expensive SSL certificate is one which will verify your name and address and it’s most often used by big websites like online shops.
2. Change your WordPress admin area to HTTPS
When you ordered your SSL certificate and it is available to use, I would recommend to first change your WordPress admin area to use HTTPS. To do this, you only need to add the following line of code to your wp-config.php file.
define('FORCE_SSL_ADMIN', true);
You should add the line of code above the following:
/* That's all, stop editing! Happy blogging. */
In case you never edited your wp-config.php file yourself before, you can find the file in your main WordPress folder (called wp-content in most cases). You can access the folder via a FTP program like the free Filezilla.
You can find a detailed explanation on how to change your WordPress admin area to use HTTPS in the WordPress.org Codex.
3. HTTPS for your entire WordPress website
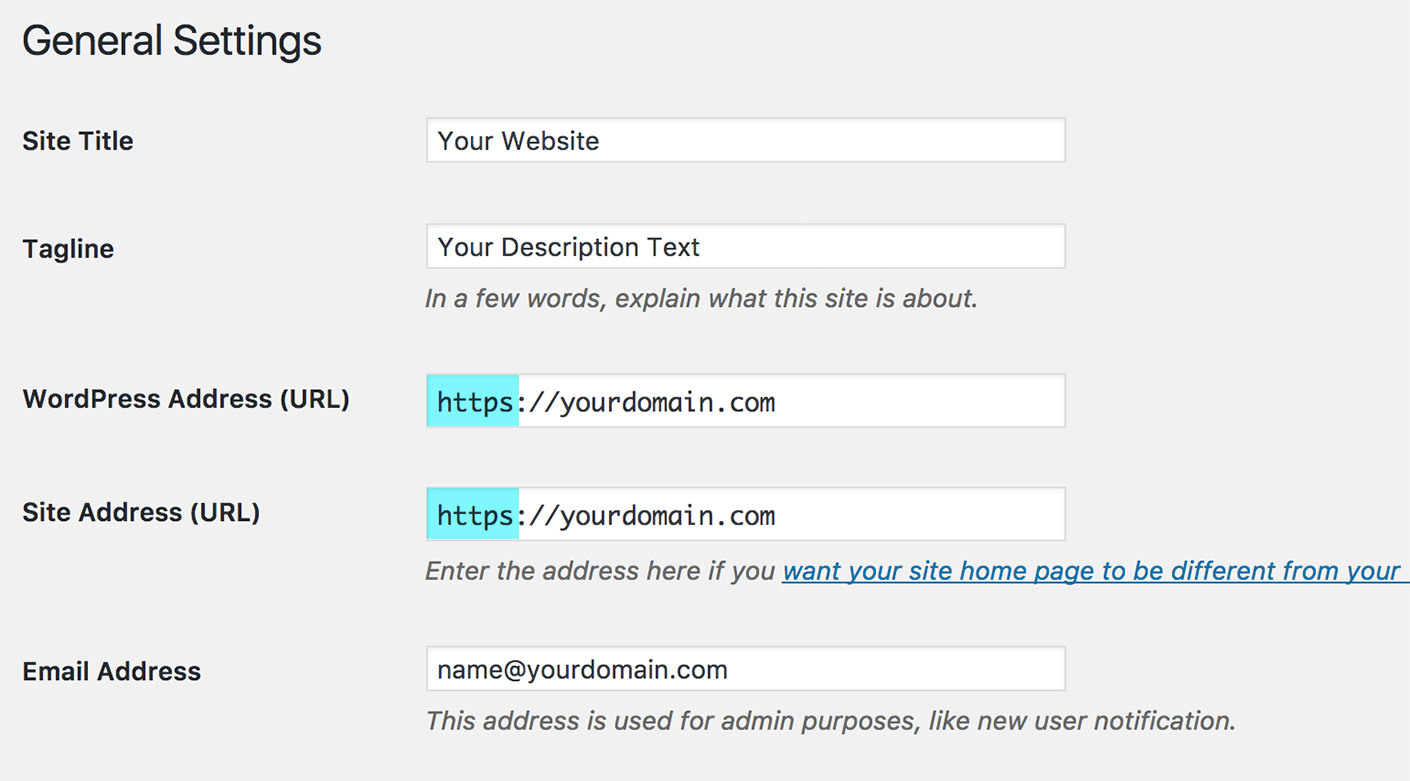
Once you switched your admin area to HTTPS and you didn’t experience any issues there, you are ready to move your entire website. The first step here is to change your website URL in the WordPress admin area. You can find your website URL under Settings/General.
Noe your website is already using HTTPS and all links you use should now also be changed to HTTPS. An extremely helpful tool for this step is the WordPress plugin Better Search Replace. The plugin will search through your entire database tables and find all HTTP URLs for you. Then you can just replace them with their HTTPS version. You will need to include your HTTP URL (e.g. http://yourdomain.com) in the “Search for” text field and the new HTTPS URL (e.g. https://yourdomain.com) under “Replace with”.
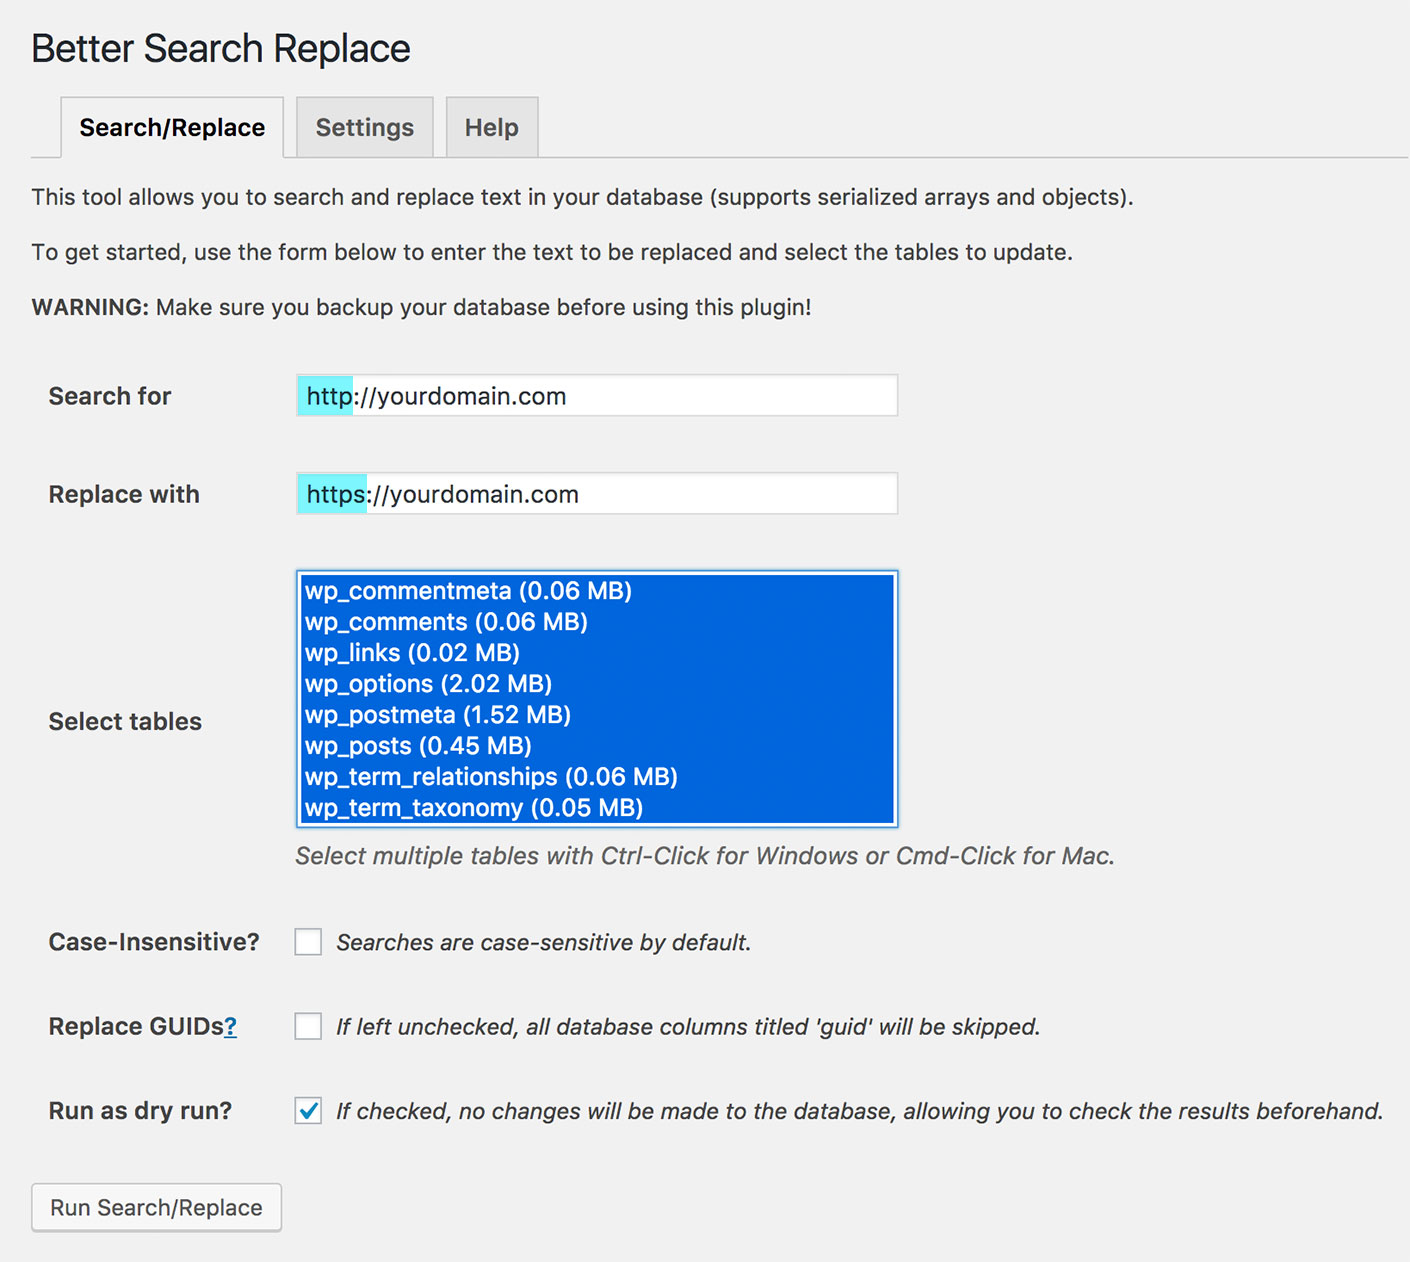
It’s highly recommended to first use the „Dry Run“ option for this in the plugins settings. This way you can test the process first, before actually doing any live changes in your database tables. It’s also important to make a database backup beforehand. If you have some big database tables, I would also advice not to select all tables at once, but rather do the search and replace process in multiple steps.
4. How to solve possible issues
You don’t need to worry, if you don’t see a green lock in your browser address bar right away. In most cases you will be able to solve the issues easily. To see what causes the errors, look at your browser inspector (e.g. in Google Chrome or Firefox) under Console. There you can find the detailed information, where you still have HTTP URLs active on your website.
Alternatively you can also use the Why No Padlock website, to check for existing HTTP URLs. They could be links in your theme, e.g. if you use an older WordPress theme.
5. Force HTTPS via your htaccess File
The last step to take is to set up a 301-redirection for all your HTTP URLs to the new HTTPS version. This way your website will always be used in the HTTPS version, even if someone still uses the HTTP URL. This step is very important, since other websites might still link to the old HTTP links (e.g. if you got mentioned on other blogs). It took me a few attempts before I found the correct redirect rule for our Elmastudio website.
The code we use is:
RewriteEngine On
RewriteCond %{HTTPS} !=on
RewriteRule ^ https://%{HTTP_HOST}%{REQUEST_URI} [L,R=301]
Using your FTP access, will find your htaccess file in the main folder of your WordPress installation (so the same folder you will also have your wp-config.php file in). From my own testing the code only worked, if I included it at the very beginning of our htaccess file, even though I read on some blogs to include the rule below # END WordPress (please let me know, if you maybe have more info in this).
6. Final thoughts and to do’s
So here you go, you changed your WordPress website to HTTPS. And if you didn’t experience any issues using the “Better Search Replace” plugin, everything should work smoothly already. In case you are using Google’s Search Console, you should also make sure to include your website’s HTTPS version there. You should also change your URL to HTTPS in Google Analytics. In case you are using a XML sitemap, make sure to update your sitemap. In most SEO plugins you can generate the sitemap automatically. If you have other websites linking to your newly changed site, don’t forget to update the links to HTTPS there. Also check your links on your social media profiles (Twitter, YouTube or Facebook) and update all links to your website there as well.
And that’s it, you made it and you should see the green browser bar lock on all your pages on posts. From our experience the move to HTTPS sounds much more complicated than it actually is. So in case you haven’t made the switch, you shouldn’t wait much longer.
If you have any further advice or experiences you want to share, please let me know. Can you recommend any further helpful WordPress plugins or blog posts to read on the topic? Please just write me a comment below, I’m looking forward to hear your feedback.
Leave a Reply