Sometimes you want to customize your WordPress theme a little bit, like changing a font color or a font style. If these theme changes are not possible in the theme by default, you can use custom CSS to overwrite or add new CSS properties to the theme styles. And how does it work? First you should already know some basic CSS. But then customizing your theme and adding your own CSS styles is really not too difficult and you have three different options to include your custom CSS. You can use a simple WordPress plugin like Simple Custom CSS or My Custom CSS.
In case you already use the Jetpack plugin you will not need to add an additional plugin, since Jetpack comes with its own Custom CSS feature. Just activate the Custom CSS feature in Jetpack and start adding your CSS under Appearance → Edit CSS. A lot of WordPress Premium themes also offer their own Custom CSS option on the theme options page or in the Customizer, so you won’t need to install an extra plugin for your Custom CSS at all. One disadvantage here is, that the CSS is dependent on the theme and will be lost, if you change the theme.
Finally you can also create a child theme and add your CSS to the child themes style.css file. Using a child theme is especially useful, if you plan to add more changes to the theme, like customizing theme template files or overwriting or adding additional functions in your own functions.php file.
WordPress Plugins for Your Custom CSS
Simple Custom CSS
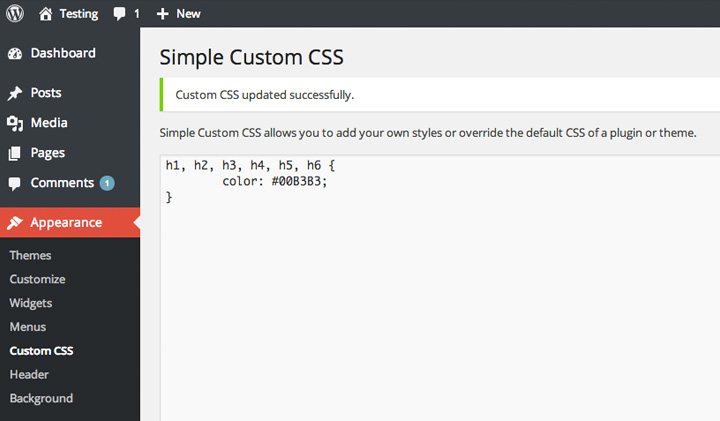
At the moment my favorite plugin for CSS customizations is Simple Custom CSS. The plugin is really easy to use. You will find the new menu button “Custom CSS” under Appearance. Here you can start to add your custom CSS styles.

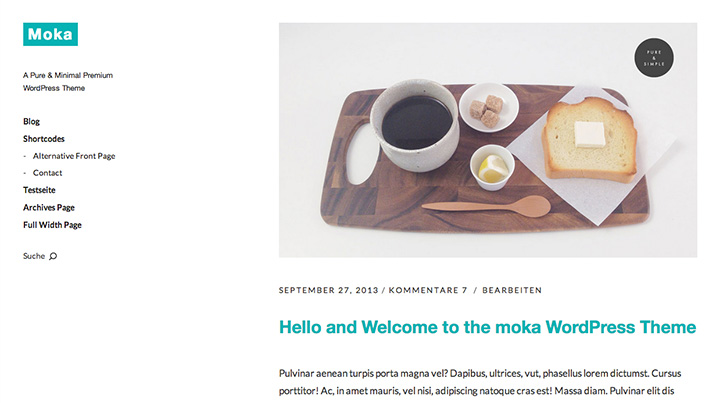
After saving your new CSS you can check your changes in the browser.

Finding the Right CSS Properties in Your Theme
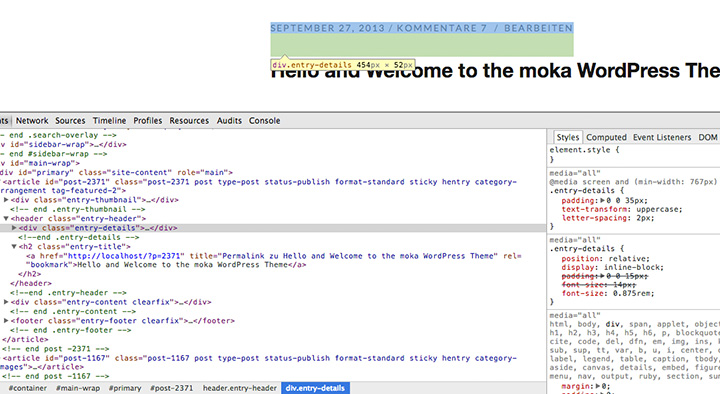
If you’re not sure which CSS property to customize in your theme in order to achieve your desired changes, you can use browser developer tools such as the ” Inspect Element” (e.g. in Firefox or Chrome) or browser Add-ons like Firebug (for Safari, Chrome and Firefox).

Here you can find more detailed information on how to use the browser dev tools for Chrome or Firebug for Firefox.
Use !important
Since your new CSS rules will overwrite the themes CSS properties by default, in most cases you won’t need to add the !important rule. If a CSS property can not be changed, you can use !important. like in the following example:
[code]
.entry-details {
text-transform: none !important;
}
[/code]
Jetpacks Custom CSS Feature
In case you have already installed the Jetpack plugin, you should use the Jetpack Custom CSS feature to add your CSS. After activating Custom CSS in Jetpacks plugin settings, you can start writing your CSS under Appearance → Edit CSS.
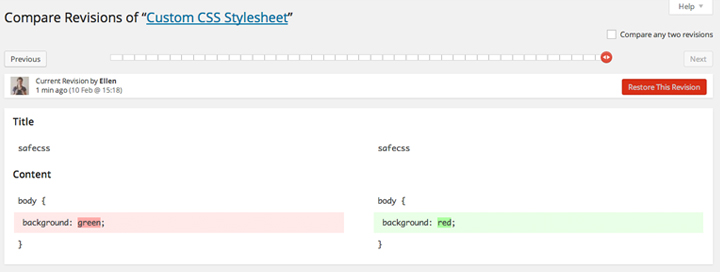
This way you will not have to install any additional plugins. Jetpacks Custom CSS also offers “CSS Revisions” as a nice additional feature. With CSS revisions you can easily compare the changes you made and also go back to previous versions of your Custom CSS in case anything went wrong (it works the same way as post revisions).

Use Custom CSS in the Theme Options
Many Premium themes will offer you the possibility to add Custom CSS right on the theme options page with the advantage of not having to install an extra plugin for your CSS changes. But you should be aware that your custom CSS then depends on the theme and will not be available any more, after you decide to change the theme. So you should use this option for CSS changes of your current theme only.
Add custom CSS to a Child Theme
If you already have some experiences in customizing or developing a WordPress theme and you plan to add more advances changes, creating your own child theme is a good solution. With a child theme all your changes will be saved, even if you update your parent theme. You can find more information on creating a child theme in the post “WordPress Child Theme Basics” on the ThemeShaper blog.
Now all changes in your CSS can be added directly to the child themes style.css file. This way you will always have all your customization in one place and you don’t need to install any additional plugins.
Your Feedback
What plugins and tools do you find useful to integrate custom CSS in a WordPress theme? What experiences and tips can you share adding custom CSS in WordPress? I’m looking forward to hear your opinion and insights on the topic!


Leave a Reply