In der neuesten Pukeko Theme Version 1.2.0 haben wir das Themedesign noch einmal komplett aufgefrischt und einige spannende neue Theme Optionen integriert.
Ich habe ein kleines Video gemacht, in dem ich die wichtigsten Highlights der neuen Pukeko Theme-Version kurz vorstelle:
Ein frischeres Design und neue Features
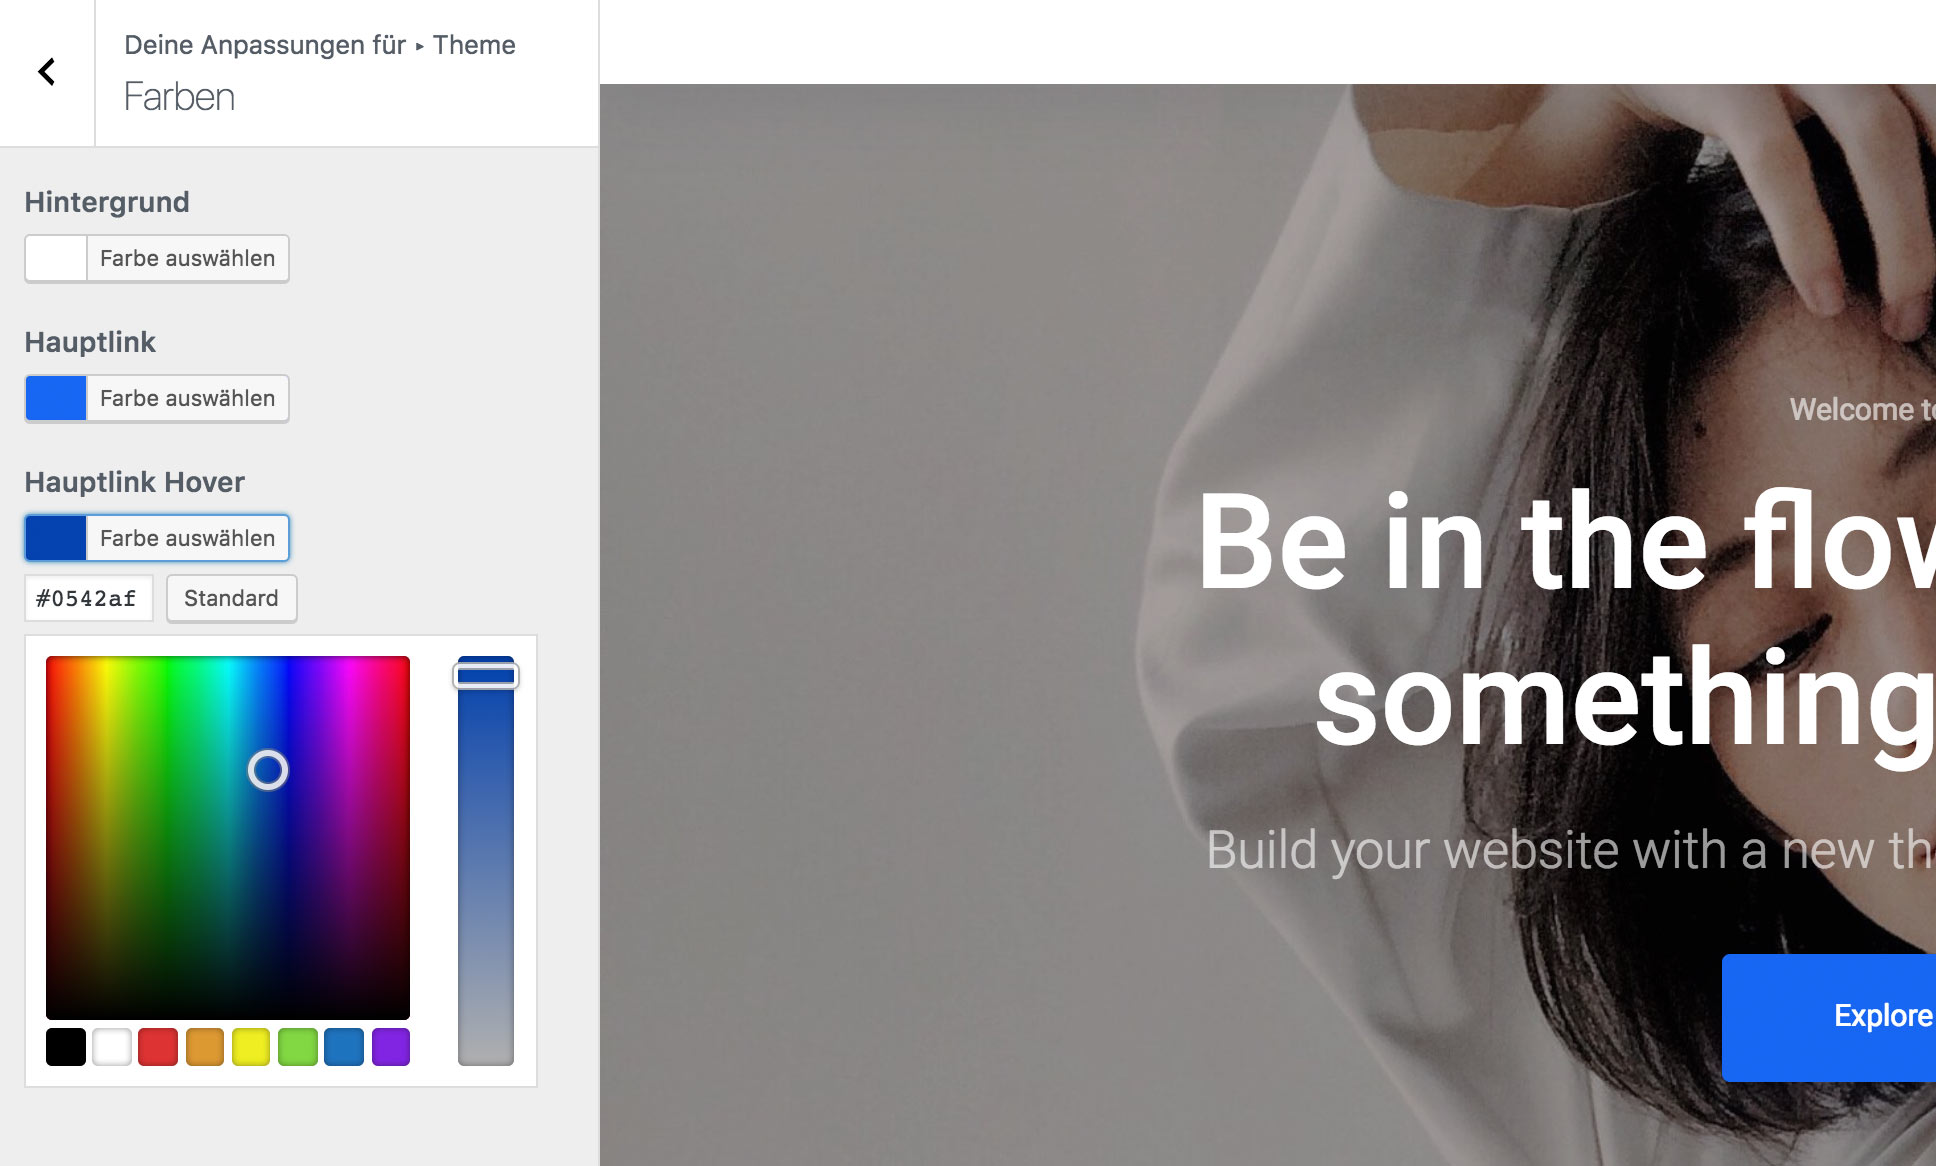
In den letzten Wochen haben wir noch einmal alle Elemente unseres Designsystems für Pukeko überarbeitet. Das Ergebnis ist ein frischeres Design mit verbesserter Lesbarkeit und einem einheitlicheren Gesamtbild.
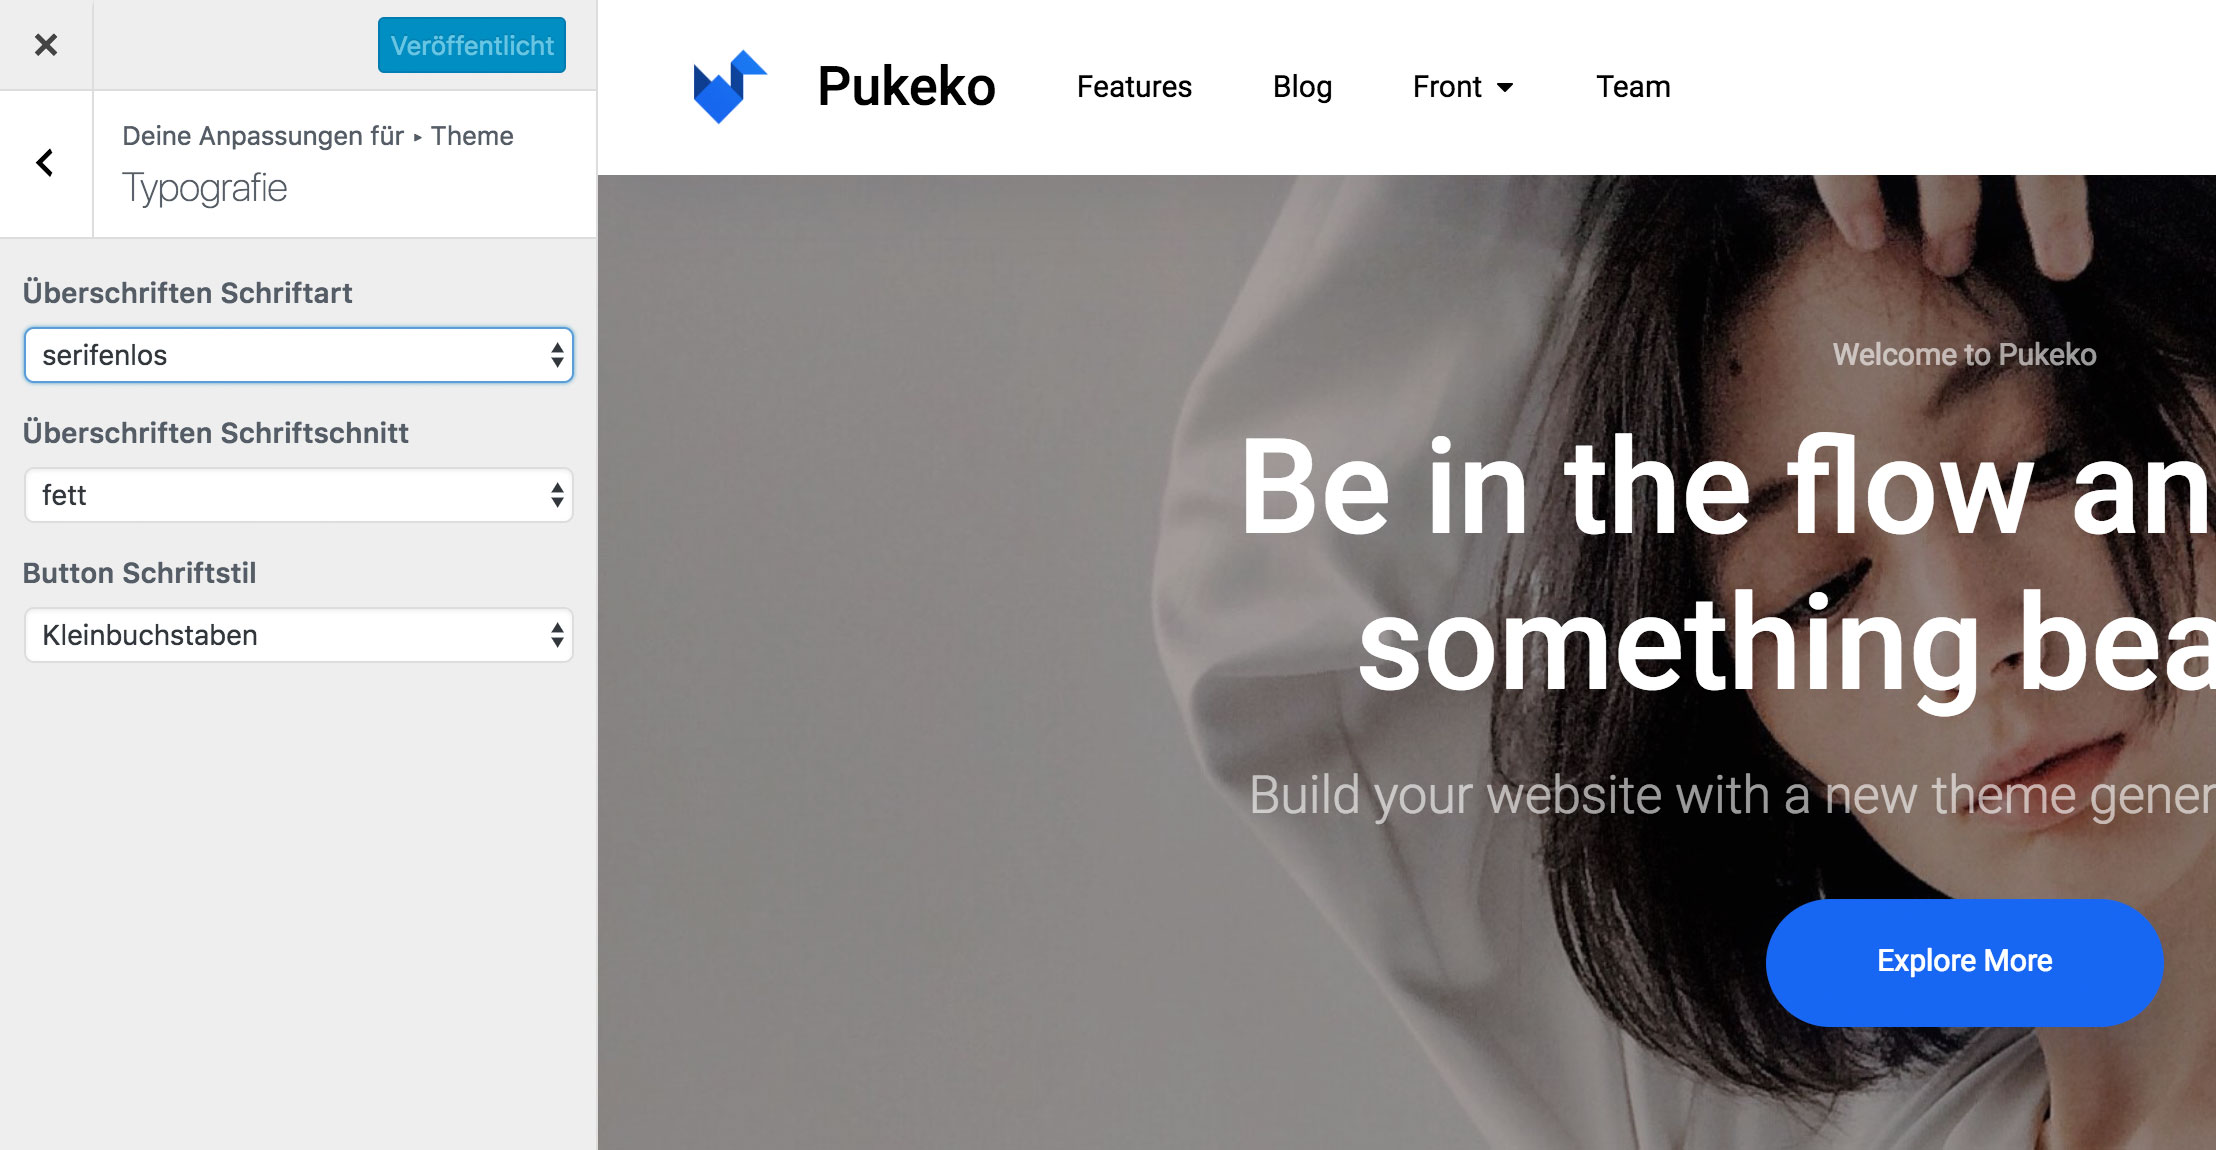
Es gibt ab sofort die Möglichkeit zwischen serifen- und serifenlosen Überschriften zu wählen. Der Schriftschnitt der Überschriften kann außerdem auf normal oder fett gesetzt werden. Buttons können jetzt in Groß- oder Kleinbuchstaben anzeigen werden.
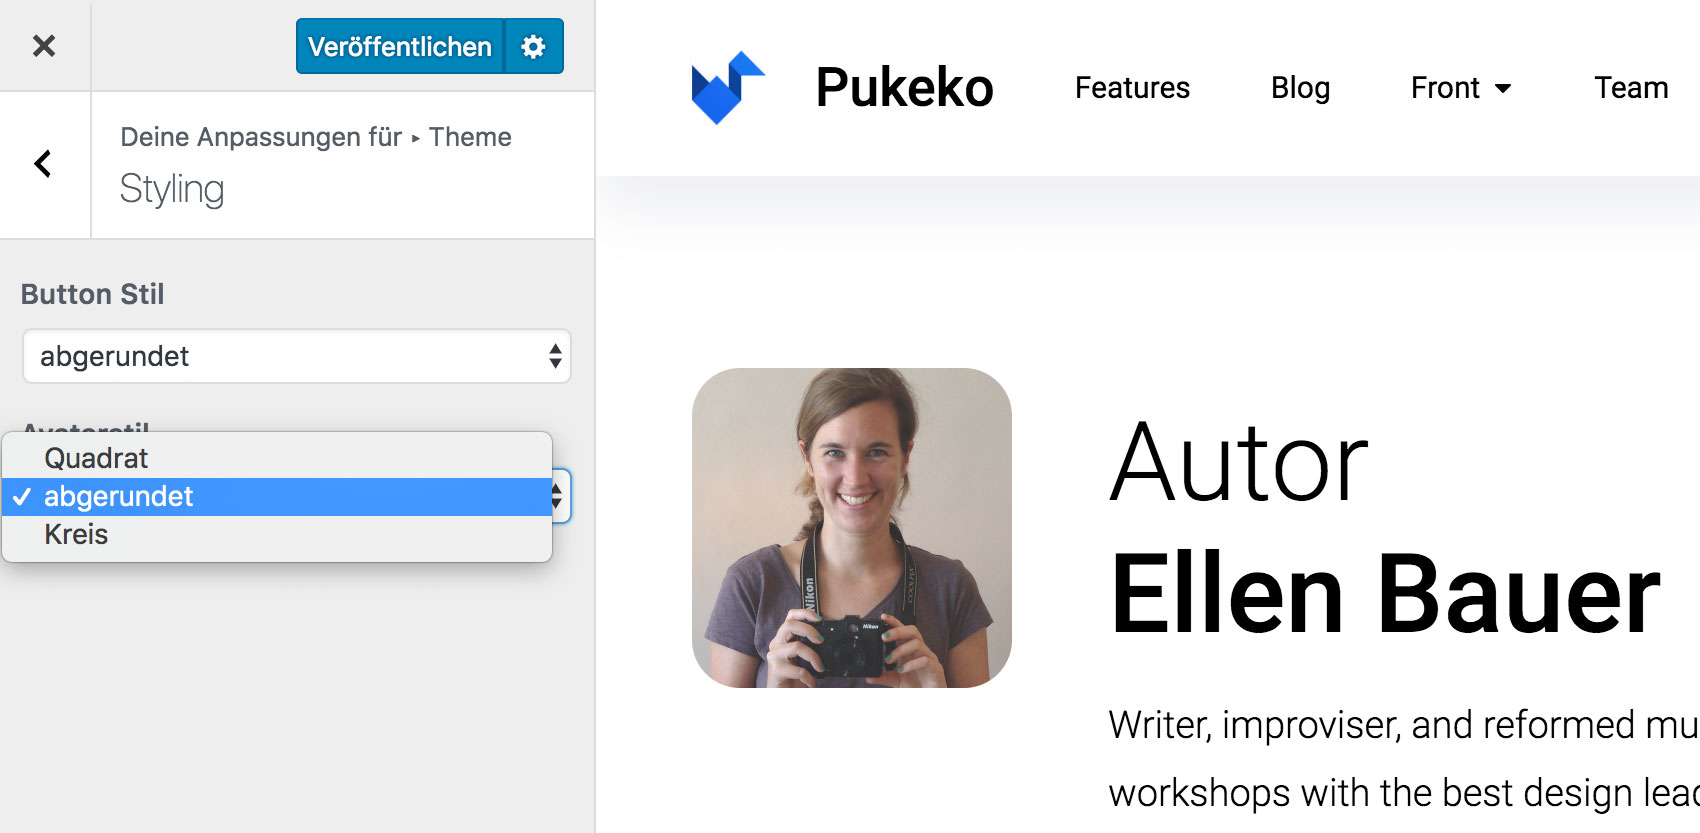
Wir haben Buttons überarbeitet und die Styling Optionen für Buttons erweitert.
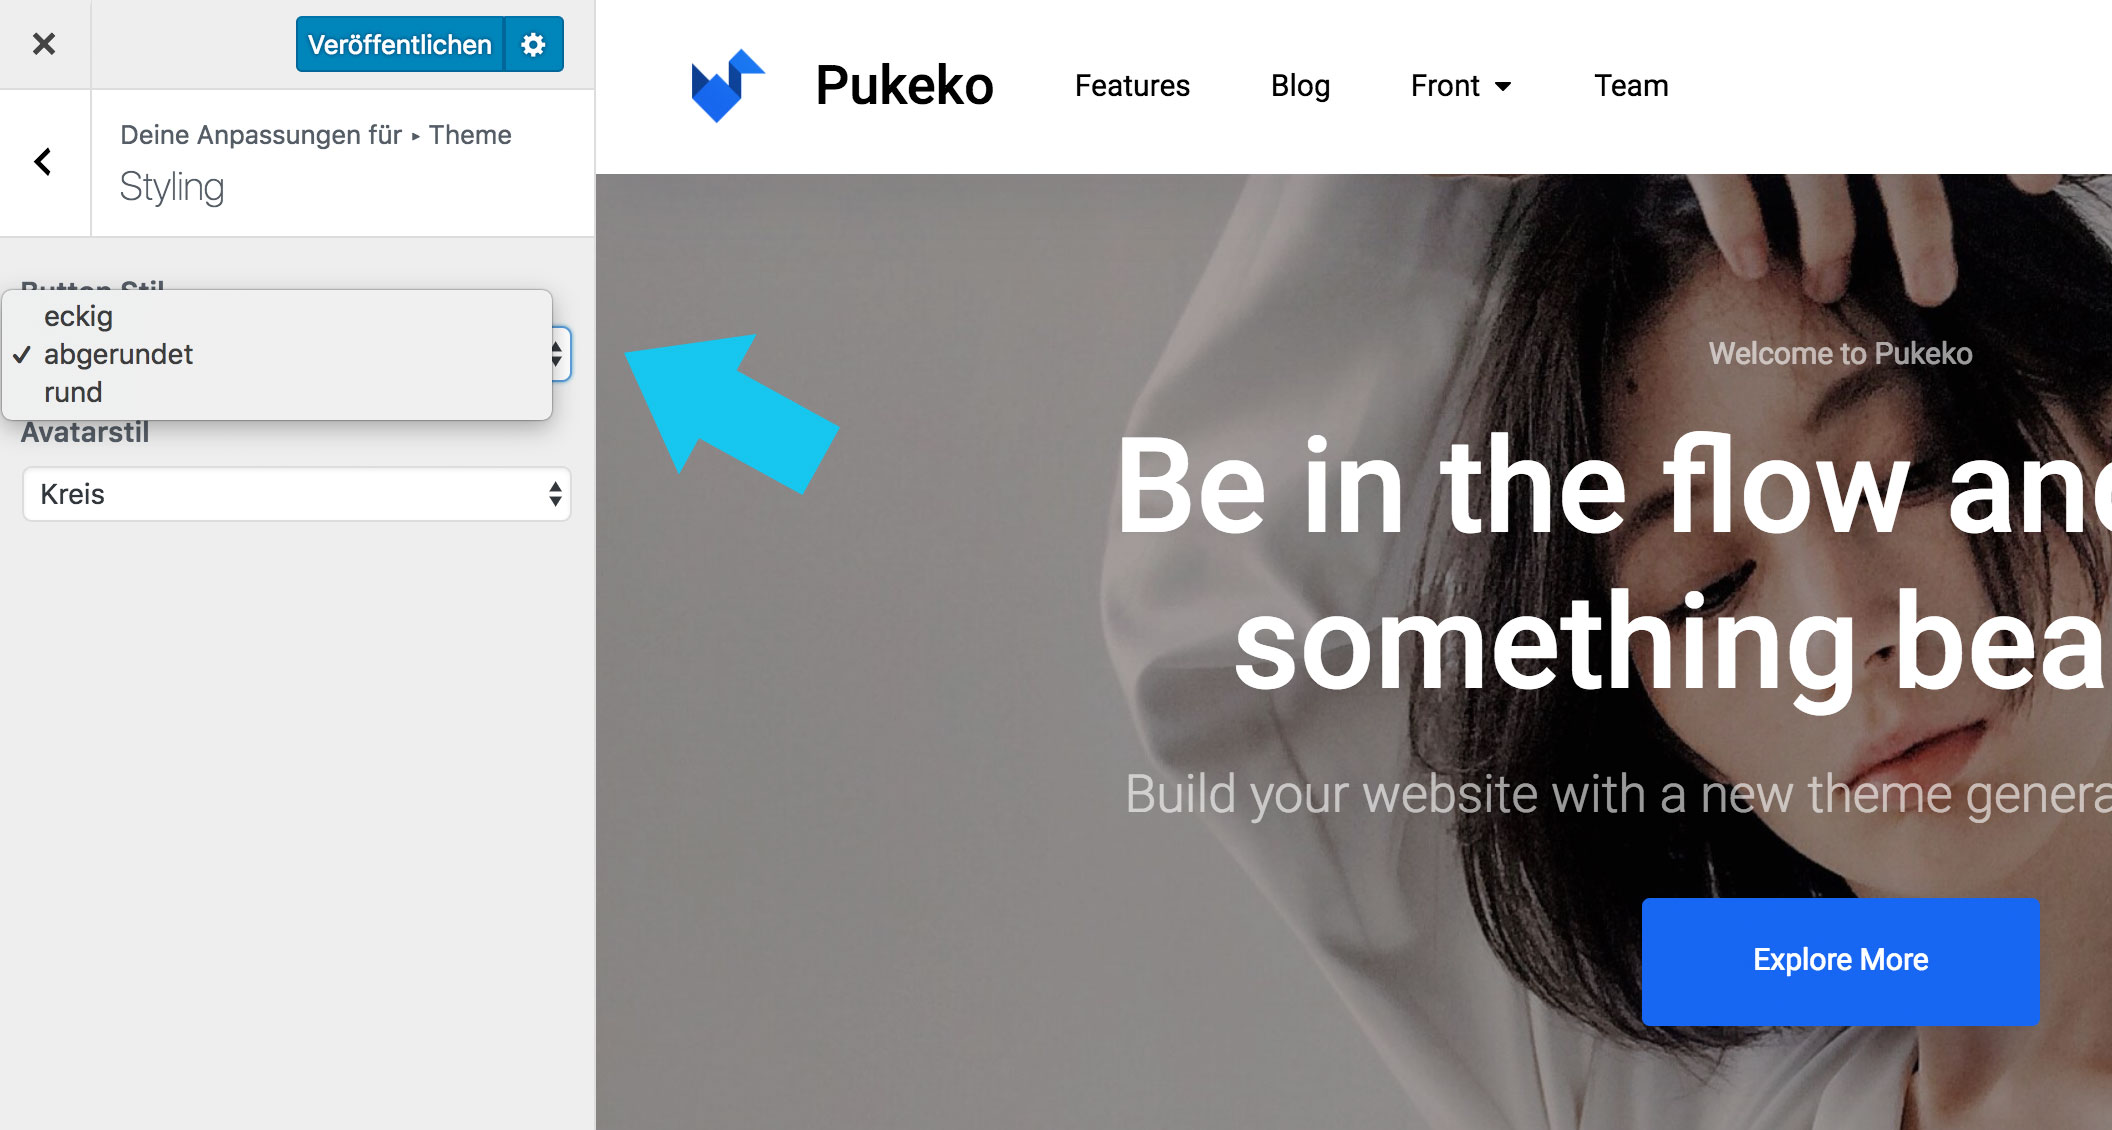
Avatare können jetzt quadratisch, abgerundet oder als Kreise angezeigt werden.
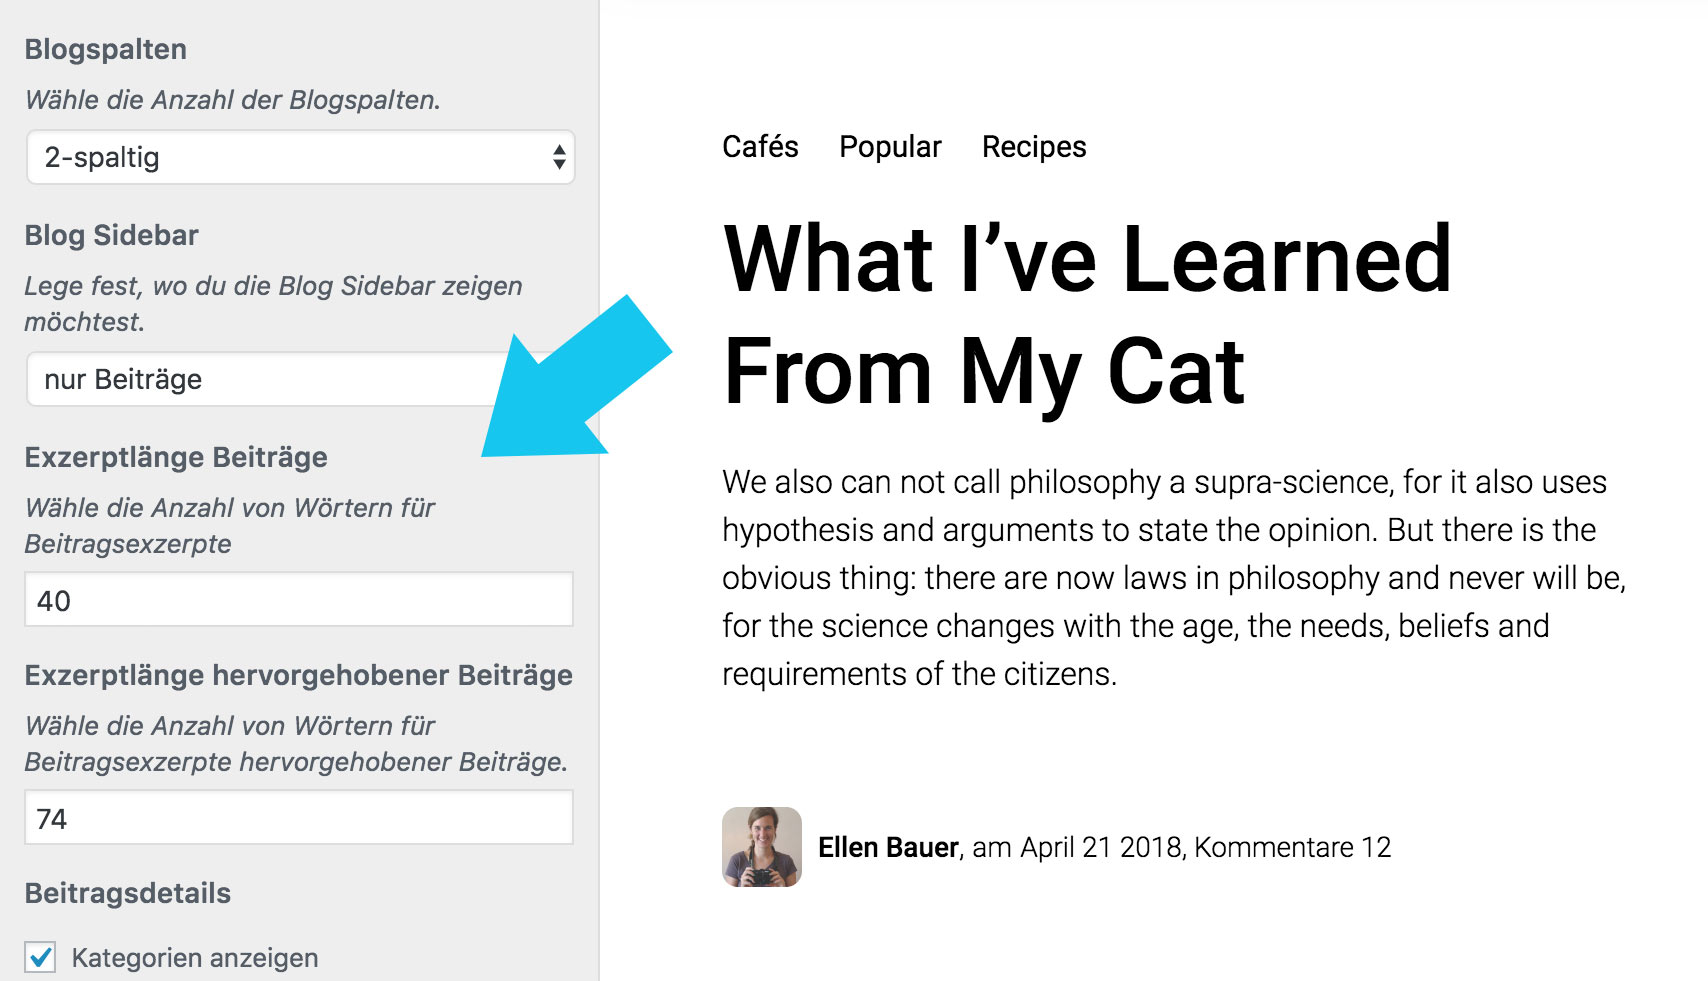
Exzerptlängen für Blogbeiträge können jetzt individualisiert werden.
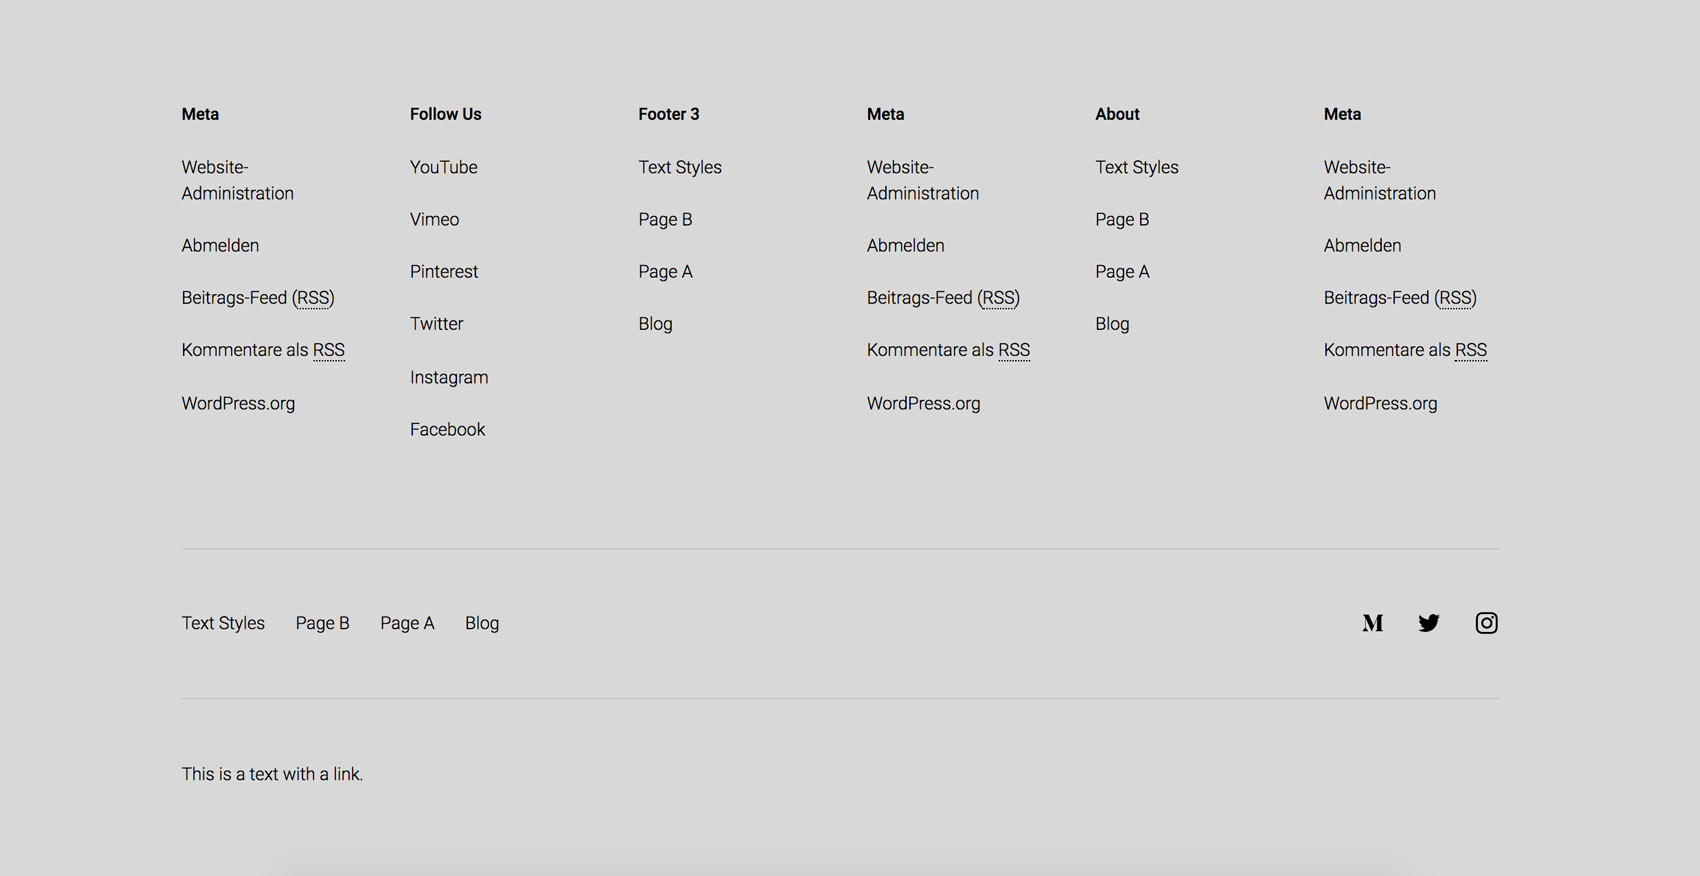
Es gibt drei neue Footer Widgetbereiche, so dass du jetzt bis zu 6 Footerspalten anzeigen kannst. Die Farben des Footers und der Footerschrift können außerdem angepasst werden.
Wichtig war uns beim Update alle Theme-Optionen benutzerfreundlich und übersichtlich zu gestalten. So kannst du mit ein paar Klicks den Designstil anpassen und leicht einen neuen Look für deine Webseite kreieren.
Gutenberg Editor Optimierungen
Wir haben alle Standard Gutenberg-Blocks überarbeitet, so dass Theme Nutzer wirklich eine echte Vorschau des Beitrags bekommen, wenn sie ihre Inhalte im Gutenberg-Editor erstellen.
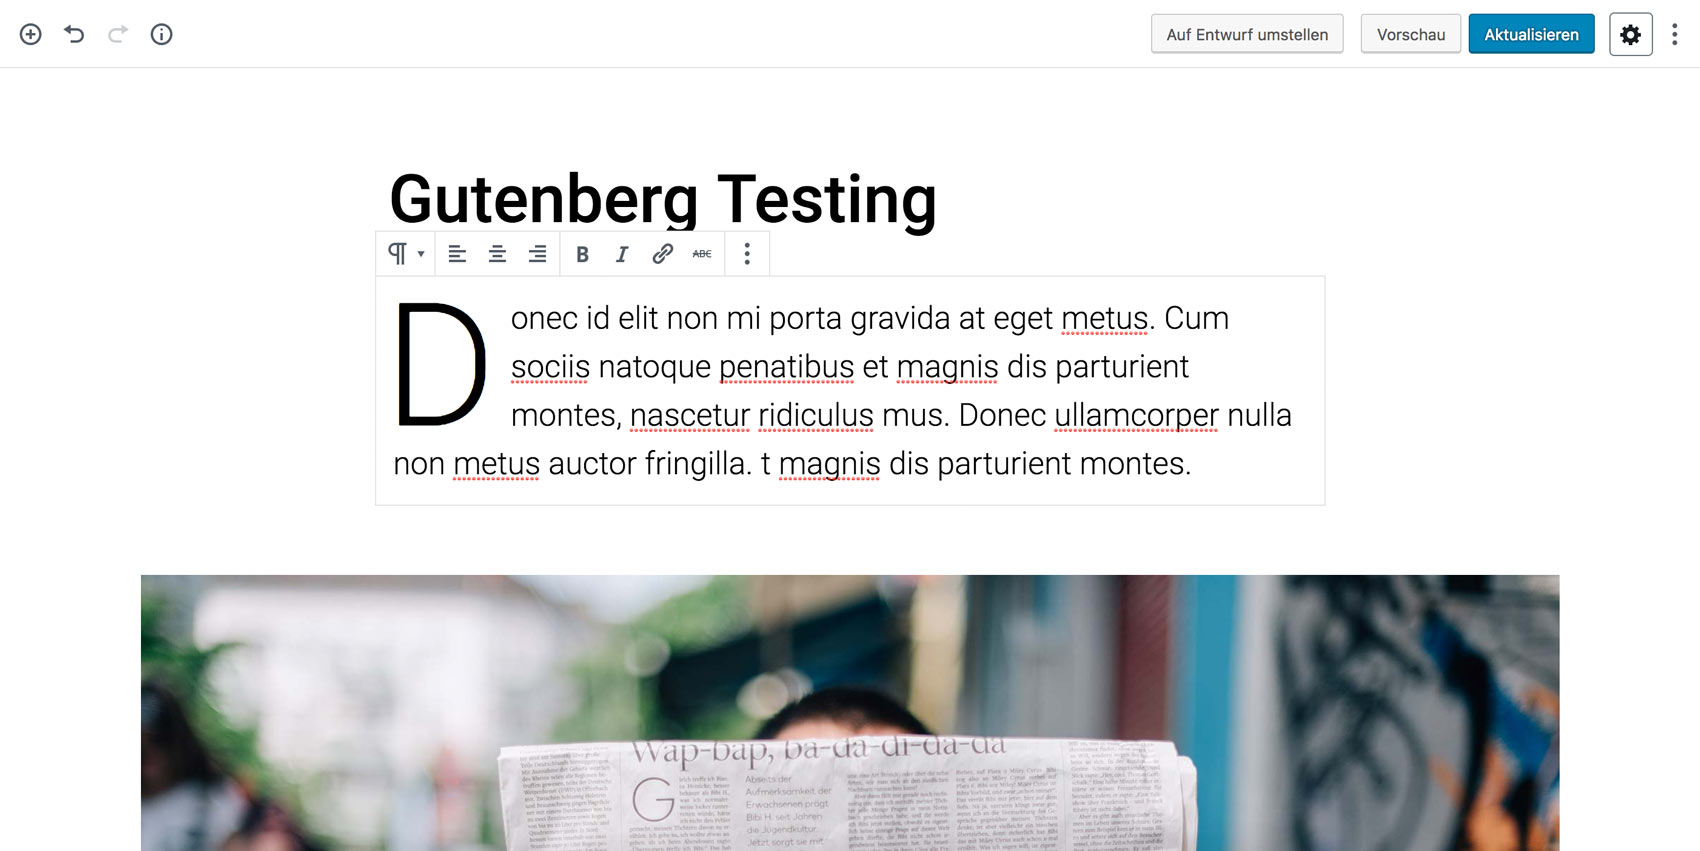
Alle Theme Optionen werden jetzt im Editor reflektiert. Wenn du deine Überschriften auf die serifenlose Schrift eingestellt hast, wird diese ab jetzt auch im Editor genutzt.
Was kommt als nächstes?
Die Gutenberg Editor Veröffentlichung in WordPress 5.0 steht in Kürze an. Daher konzentrieren wir uns derzeit darauf, die Pukeko Gutenberg-Blocks zu erweitern und so Pukeko komplett mit Gutenberg umsetzbar zu machen. Unser Ziel ist es, komplett auf externe Pagebuilder verzichten zu können, obwohl das Elementor Plugin auf jeden auch weiterhin unterstützt wird.
Außerdem wird Pukeko endlich bald ein Update mit WooCommerce-Unterstützung bekommen. Neue Pukeko-Demos sind auch in Arbeit, so dass du die Demo-Templates als Vorlage für die Arbeit an deiner eigenen Webseite nutzen kannst. Yeah!!!
Dein Feedback
Sag uns Bescheid, welche neuen Features und Optionen du dir für das Pukeko Theme wünscht. Wir freuen uns auf dein Feedback und werden versuchen alle Wünsche zu berücksichtigen. Schreib uns einfach einen Kommentar, eine Email oder melde dich auf Social Media bei uns.
Schreibe einen Kommentar