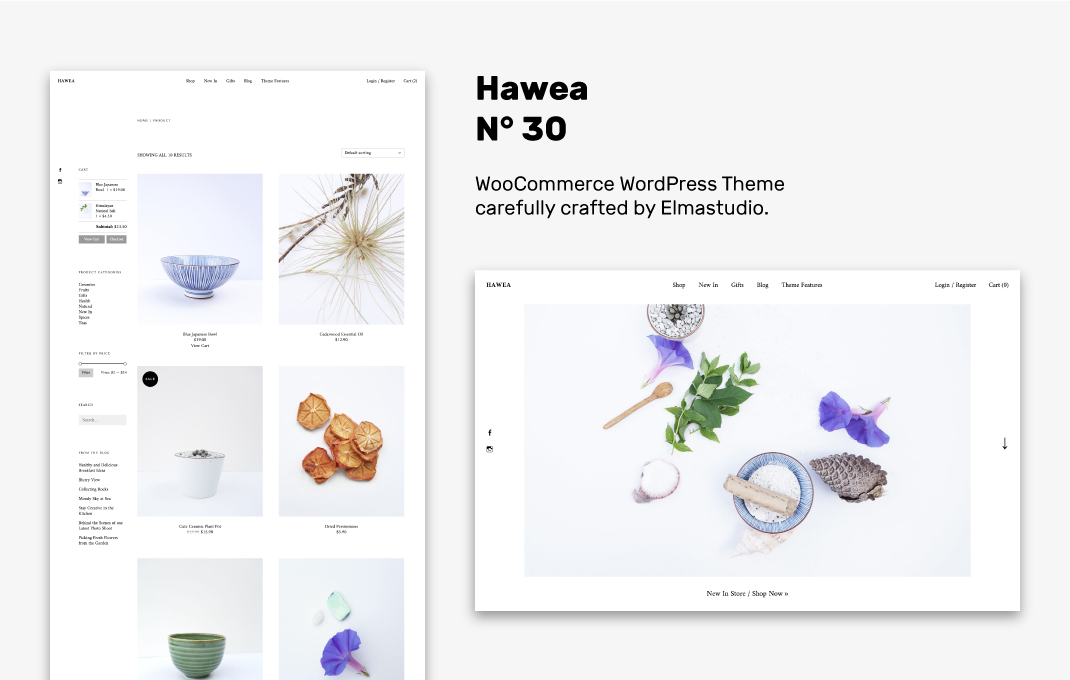
Wir freuen uns riesig dir heute endlich unser allerneuestes eCommerce WordPress Theme Hawea zeigen zu können. Hawea ist ein Shop-Theme, dass mit dem kostenlosen WooCommerce Plugin genutzt werden kann. So kannst du dir mit Hilfe von WordPress, WooCommerce und Hawea ganz leicht einen wunderschönen, eleganten und minimalistischen Online-Shop einrichten. (Schaue dir die Hawea Live Demo an.)
Ein Highlight von Hawea ist die Startseite mit einem Bilder-Slider und unterschiedlichen Produkt-Blöcken, die du individuell anzeigen kannst. Außerdem hat Hawea eine wunderschöne dreispaltigen Blog-Seite mit Sidebar, eine großzügige zweispaltige Standard-Shopansicht, einen großen Footer mit jeder Menge Widgetbereichen, so dass du z.B. deine Instagram-Bilder oder ein Newsletter-Formular zeigen kannst.
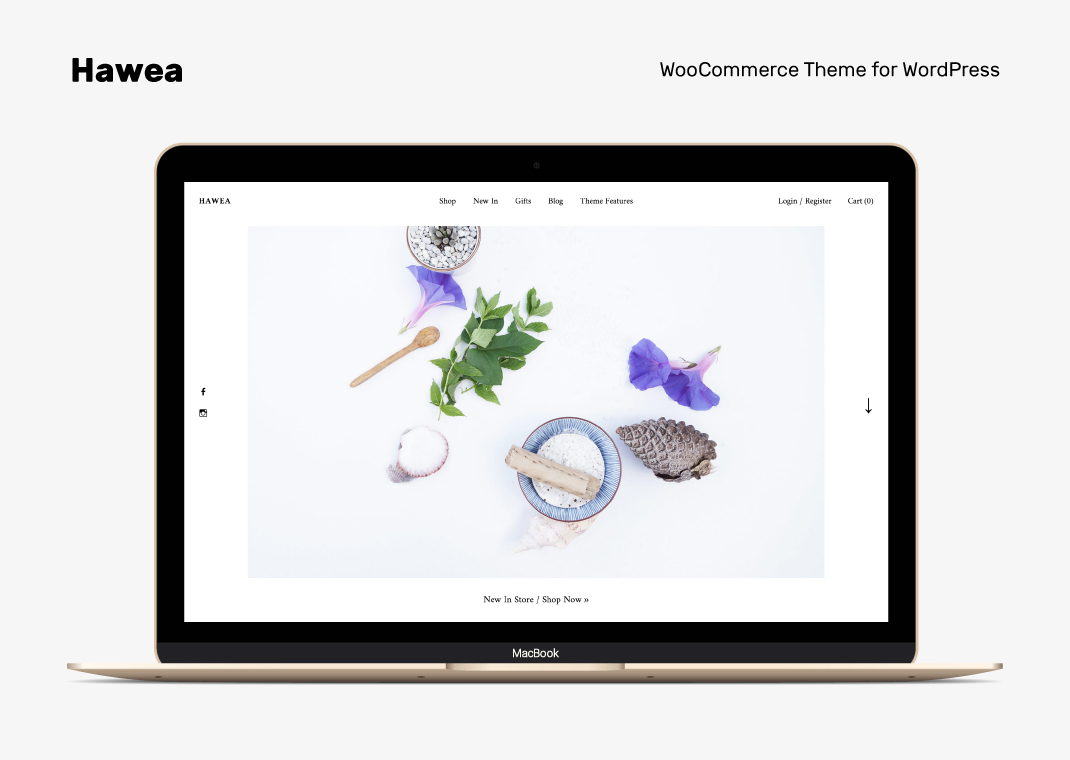
Die individuelle Startseite
Über die Theme-Optionen (unter Design / Anpassen) kannst dir auf der Hawea-Startseite einen wunderschön großzügigen, skalierbaren Bilder-Slider einrichten. Du kannst die Bilder auf einer deiner Unterseiten verlinken und zusätzlich einen kleinen Text mit Links unter dem Bild hinzufügen.
Außerdem kannst Du die Produkt-Kategorien mit Bildern zeigen, über den normalen Seiten-Inhalt deiner Startseite besondere Aktionen in deinem Shop promoten und eine Reihe deiner wichtigsten Produkte featuren. Unter den Produkten kannst du dann noch deine neuesten Instagram-Bilder zeigen (die Option findest du unter Widgets).
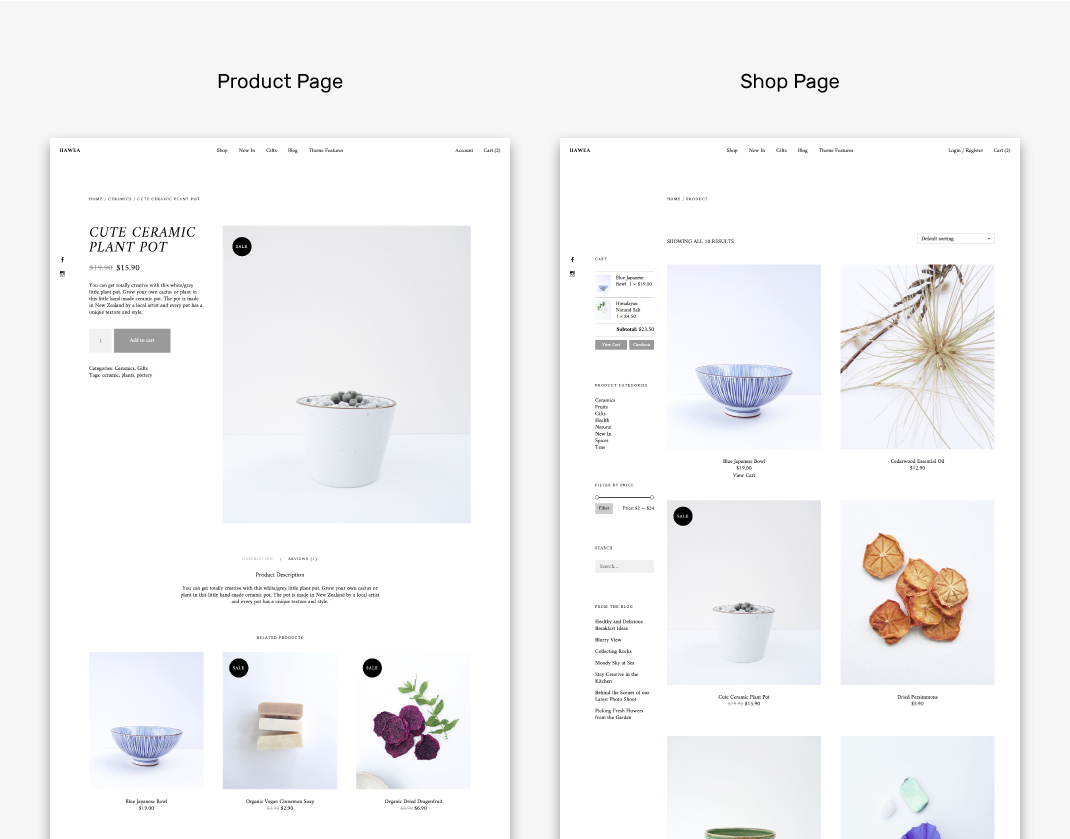
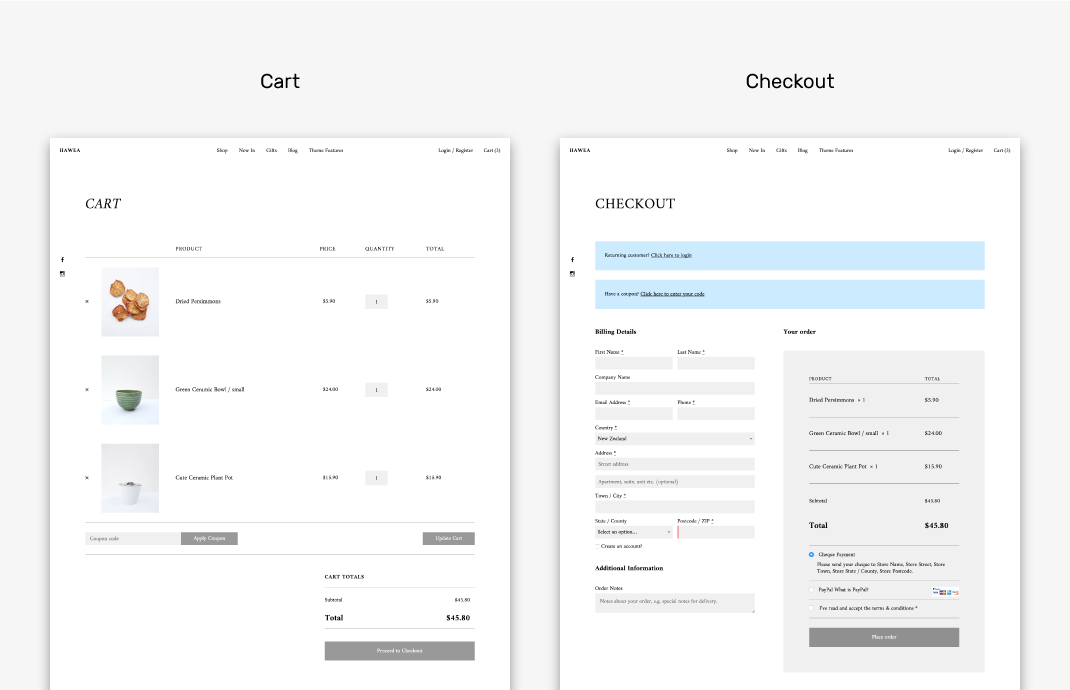
Die Shop-Seiten
Der Hawea-Shop bietet dir neben den Funktionen auf der Startseite auch einen schönen zweispaltigen Standard-Shop mit linksbündiger Sidebar, eine Produkt-Einzelseite mit der Option für schöne, große Produktbilder und eine übersichtliche Warenkorb- und Kasseseite.
Der Blog und der Footer-Widgetbereich
Neben der Shop-Funktion hat Hawea natürlich auch einen Blog. Die Blog-Seiten haben ein dreispaltiges Masonry-Gridlayout und eine linksbündige Sidebar. Auch auf den Beitrags-Einzelseiten ist die Sidebar weiterhin sichtbar, so dass du auch auf den Blog-Seiten immer die Option hast, deine Shop-Produkte zu promoten.
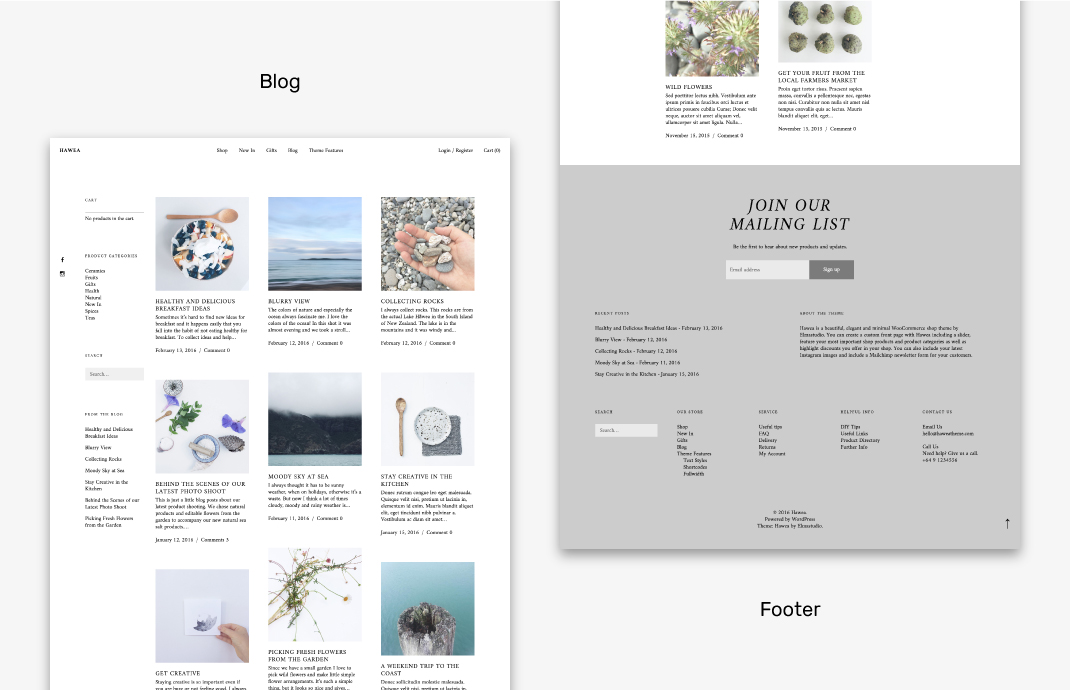
Der Footer von Hawea bietet jeden Menge Platz für Widgets. Du kannst z.B. das Mailchimp WordPress-Plugin nutzen, um einen Newsletter-Formular im Footer zu integrieren und der 5-spaltige Widgetbereich unten im Footer bietet eine gute Option, um alle wichtigen Seiten-Links deines Shops unterzubringen.
Dein Feedback
Wir hoffen dir gefällt das neues Hawea Shop-Theme. Wenn du Fragen oder Verbesserungsvorschläge zum Theme hast, oder wenn du noch Fehler im Theme findest, sag uns einfach Bescheid. Wir freuen uns schon sehr auf dein Feedback!
Hawea Bildmaße:
Slider-Bilder: max. Breite 1880px, Höhe 1200px
Produkt-Kategorie Bilder: 1410px Breite
Produkt-Bilder: 1550px x 1800px
Blog-Beitragsbilder: 500px Breite
Schreibe einen Kommentar